Users
This section is used to set permissions for all users on the system. Users will still have access to the features but have the ability to allow the user to have, or not have, permission to do different things. This gives one user control of how things will be done. Initially this will be setup by the RTM technician but it is very easy to add users to the list and set the permissions for each user.

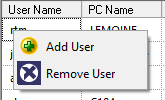
Any PC that has read & write access to the Manufacture Settings is the only place that this can be done. Right click in the column under User Name and a secondary menu will be displayed.

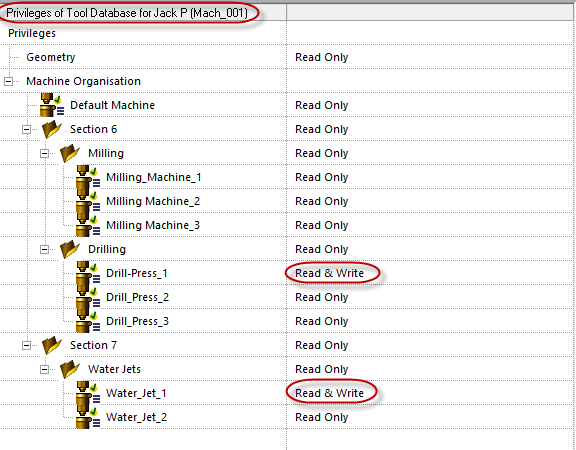
Click Add User and the login of the PC will appear under the User Name column and PC name under the PC Name column. Change the User Name and PC Name to the user to be added to the system. Click on the name and it will highlight to type in a new name (this is case sensitive). Under the User Name will be the login name of the PC, and under the PC Name will be the name the PC was given. Once you have the User Name and PC Name entered the permissions for the other field can now be set. For example, the computer with the name Mach_001 and the login Jack P. has full permissions in all features.
In the illustration computer Mach001 has permission to modify the tool database for Drill_Press_1 and Water_Jet_1. These can be changed the same way permissions were changed in the other columns.
Each blank column will give the same options and the user can decide on who can modify that feature in the software.

 Changing the permissions is easy. Select Read & Write and an arrow will show up on the right side. Click the arrow and the user will be able to select Read & Write or Read Only.
There are some columns that are blank. They are blank because there is a whole other set of permissions to set under them which is explain on the following page. Keep in mind that everyone will be able to see and use these features. It is the user’s responsibility to allow or disallow other users to modify them.