Engraving Section

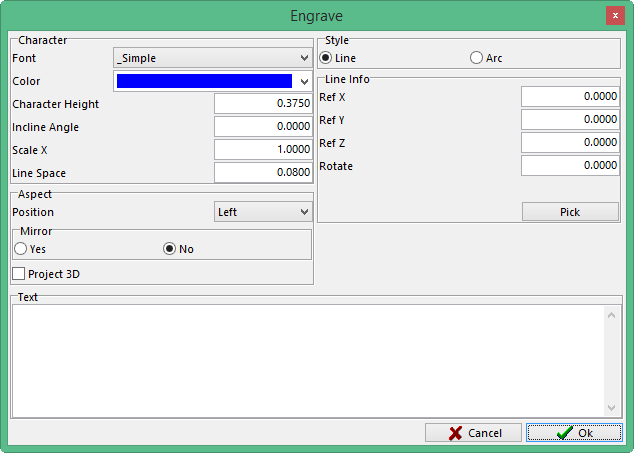
In the engraving section the user will have the ability to put text on the work piece. Selecting this option will open another window with options to manipulate the text to suit the needs of the user.

This window will have five different sections to help the user get the result needed.

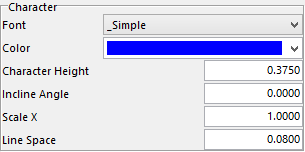
The Character options will give the user the ability to choose the type of letters to use and the ability to change them.
Font –select the type of font to use. There are several types to choose from in a pull down menu.
Color – give the user the ability to choose a color for the lettering.
Character Height – input the height or size of the lettering to be used.
Incline Angle – input an angle to have the lettering tipped, the angle will start at the bottom of the letter and angle the top towards the right.
Scale X – the letters can be elongated in the X direction without effecting the height of the letter
Line Space – this value is the amount of space in between lines. If there are multiple lines of text it will increase the space from one line to the next.

In the Aspect section, the user has the ability to modify the position of the text from the point selected. The letters can also be mirrored or projected on to a contoured surface.

Position – a pull down menu allows the user to choose what position to place the letters to be from the point that is selected. The options are Left, Right, Center and Justify. For Left, Right, and Center, the letters will be positioned that way from the point that was selected for position of the letters. Justify will add an option under the Line Info section called Msg. Length, this allows you to stretch the letters by a given value in the X axis.
Mirror – allows letters to be mirrored if they need to be readable on the part that the work piece produces.
Project 3D – with this box checked the letters will be projected on to the work piece in the Z axis of the reference that the engraving was defined in.

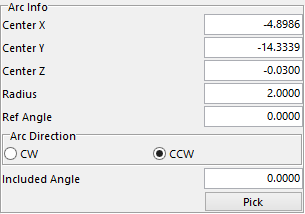
Input the center of the radius of the letters by inputting values in the X, Y and Z.
Radius – is the radius that the letters will circle the selected point.
Ref Angle – is the angle at which the letters will start at.
Arc Direction – options are CW and CCW. To read what was cut, use CW, if the user wants to ready what was cut on the produced part then use CCW.
Included Angle – this value will stretch the letters longer around the arc giving the user the ability to space them to meet a certain end angle.
Pick – this gives the ability to manually pick the position from a point on the work piece.

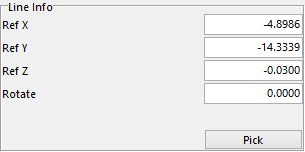
This is the standard menu when the Style selected is line.
Ref XYZ – is the point where the lettering will be anchored with.
Rotate – this value is the angle that the lettering will be on. 0.0000 been parallel with the X axis.
Pick –manually pick the position from a point on the work piece.

In this section type in the text that the user wants to put on the work piece.